Gain Staging Basics
(Zero-to-Clear Sound Guide)
Gain staging sounds like a studio word, but it’s really a Sunday morning survival skill.
Gain staging means: setting healthy signal levels at every point in the audio path so your sound stays clean (not noisy), clear (not dull), and stable (less feedback and distortion).
Why Gain Staging Matters
- Less hiss: weak input levels force you to crank later stages and bring up noise.
- Less distortion: too-hot inputs clip before your fader even gets a vote.
- Less feedback: a clean, controlled signal leaves you more usable headroom.
- Easier mixing: when inputs are “right,” faders behave like volume controls again.
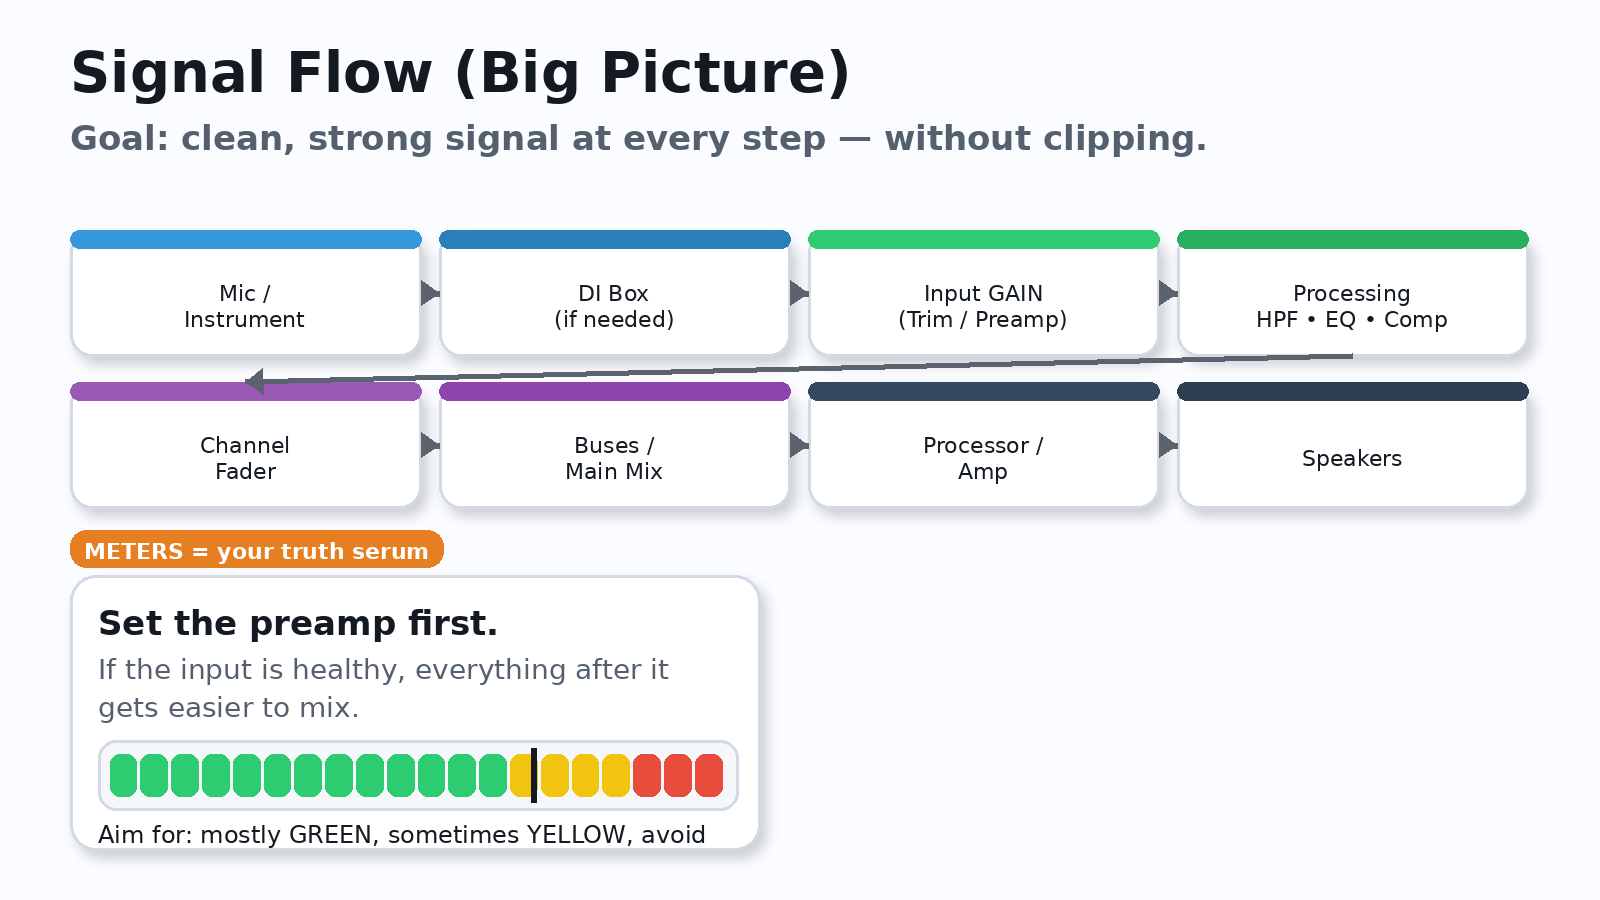
The Big Picture: Your Signal Chain
Most setups follow the same basic path:
Mic/Instrument → (DI) → Mixer Input Gain → Processing → Fader → Main Mix → Amp/Processor → Speakers
Fix problems as early as possible in the chain. If the signal is bad at the input, everything after it is just “making a bad signal louder.”
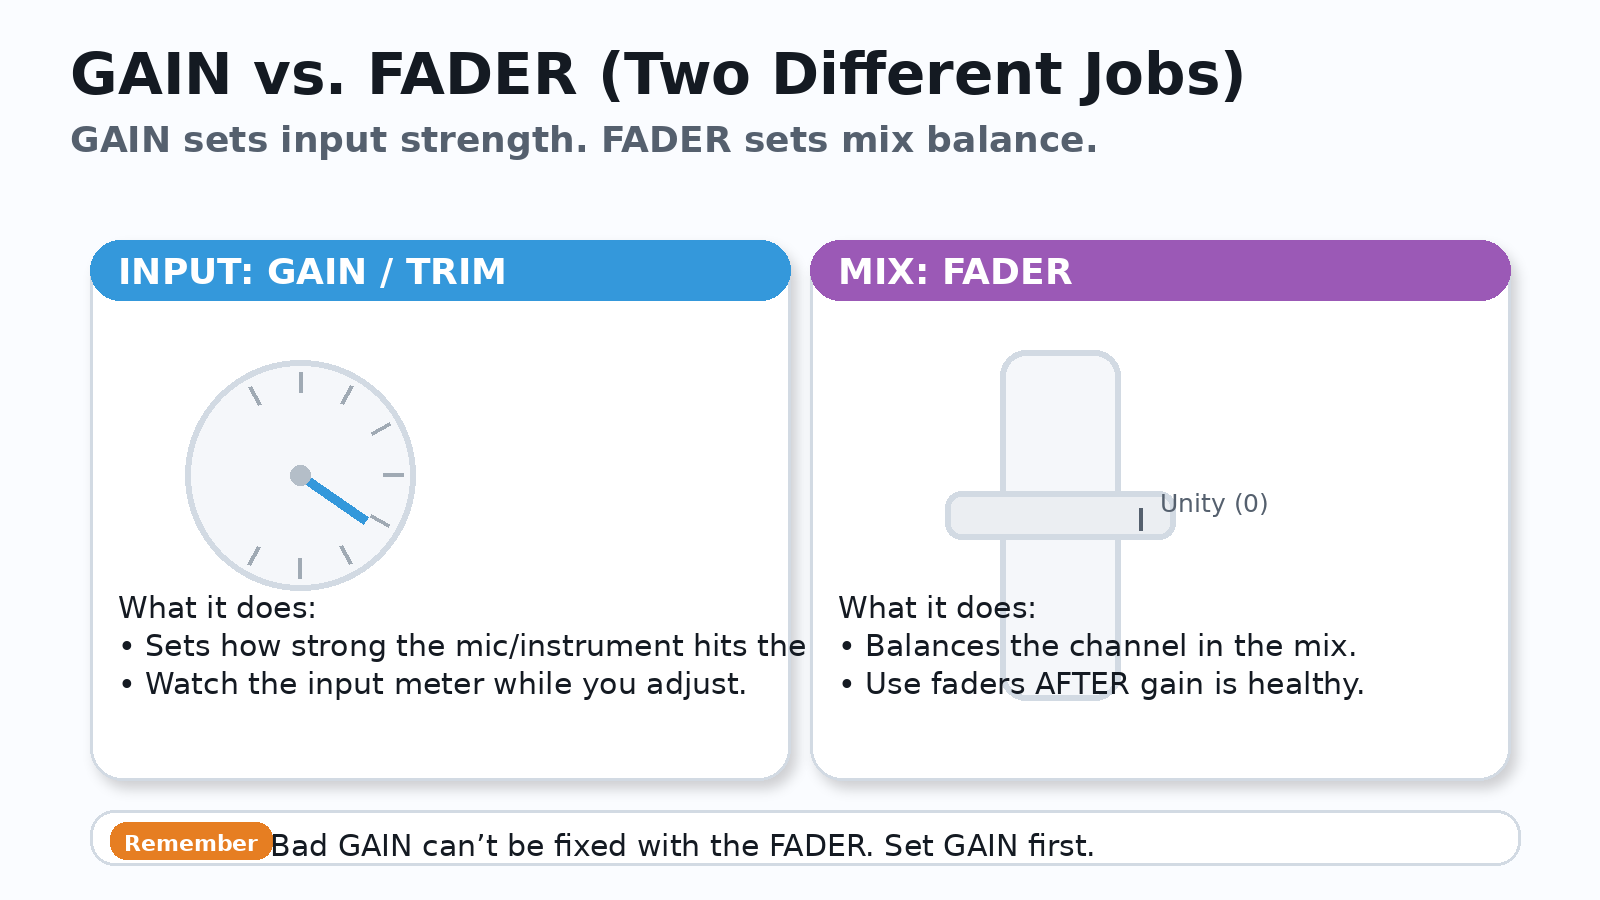
GAIN vs. FADER (The confusion that haunts volunteers)
Metering: What You’re Actually Looking For
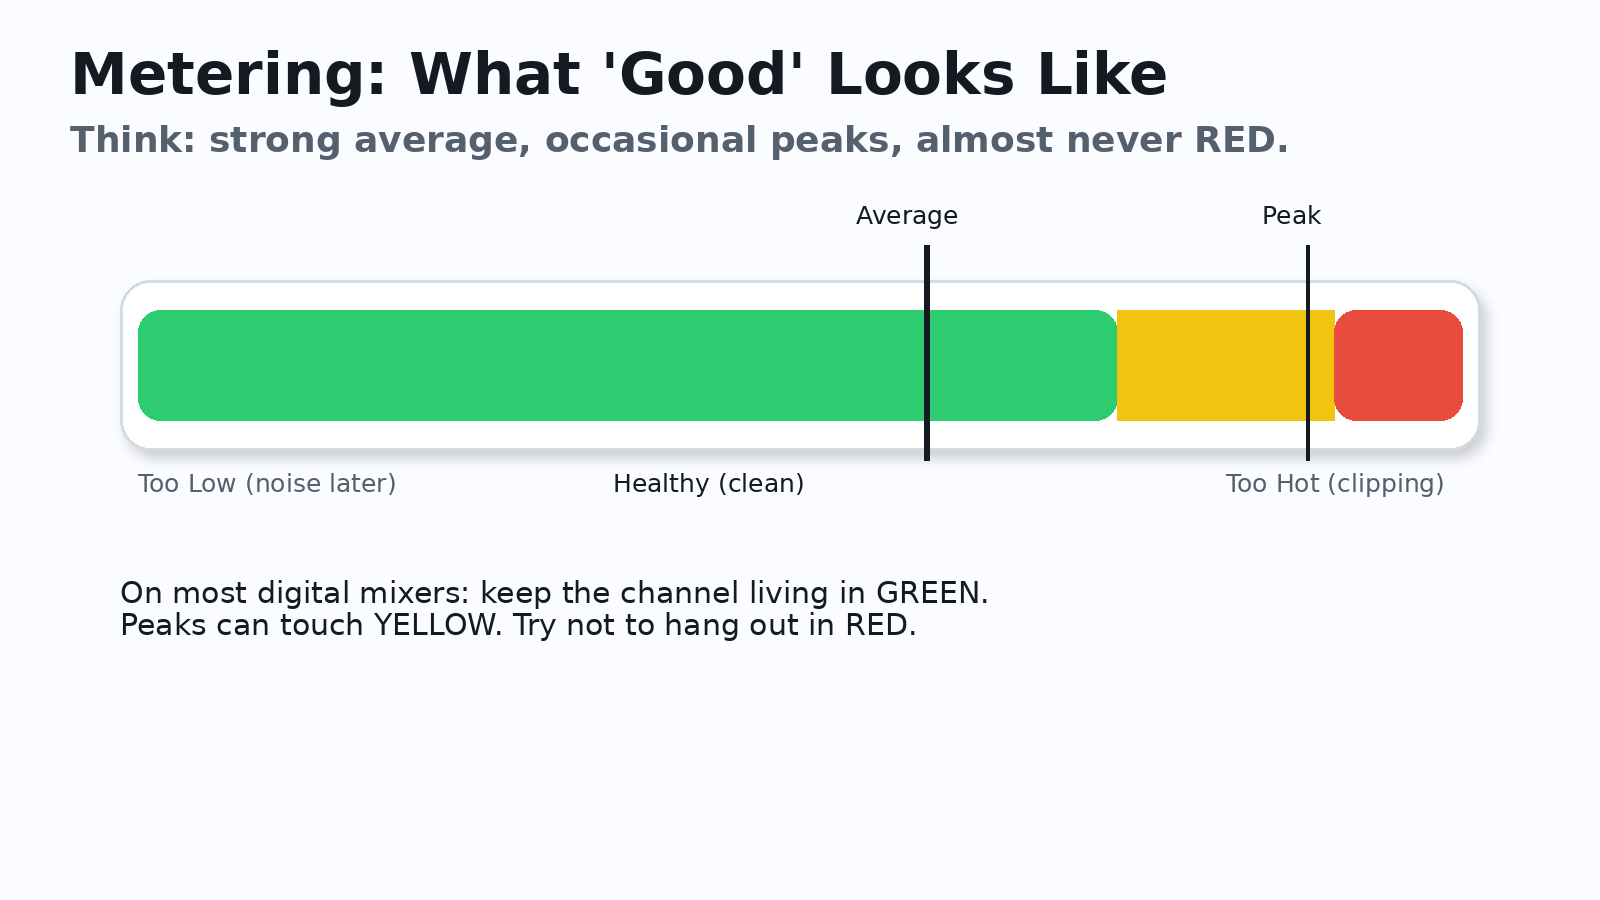
Good vs. Bad Metering (what it looks like)
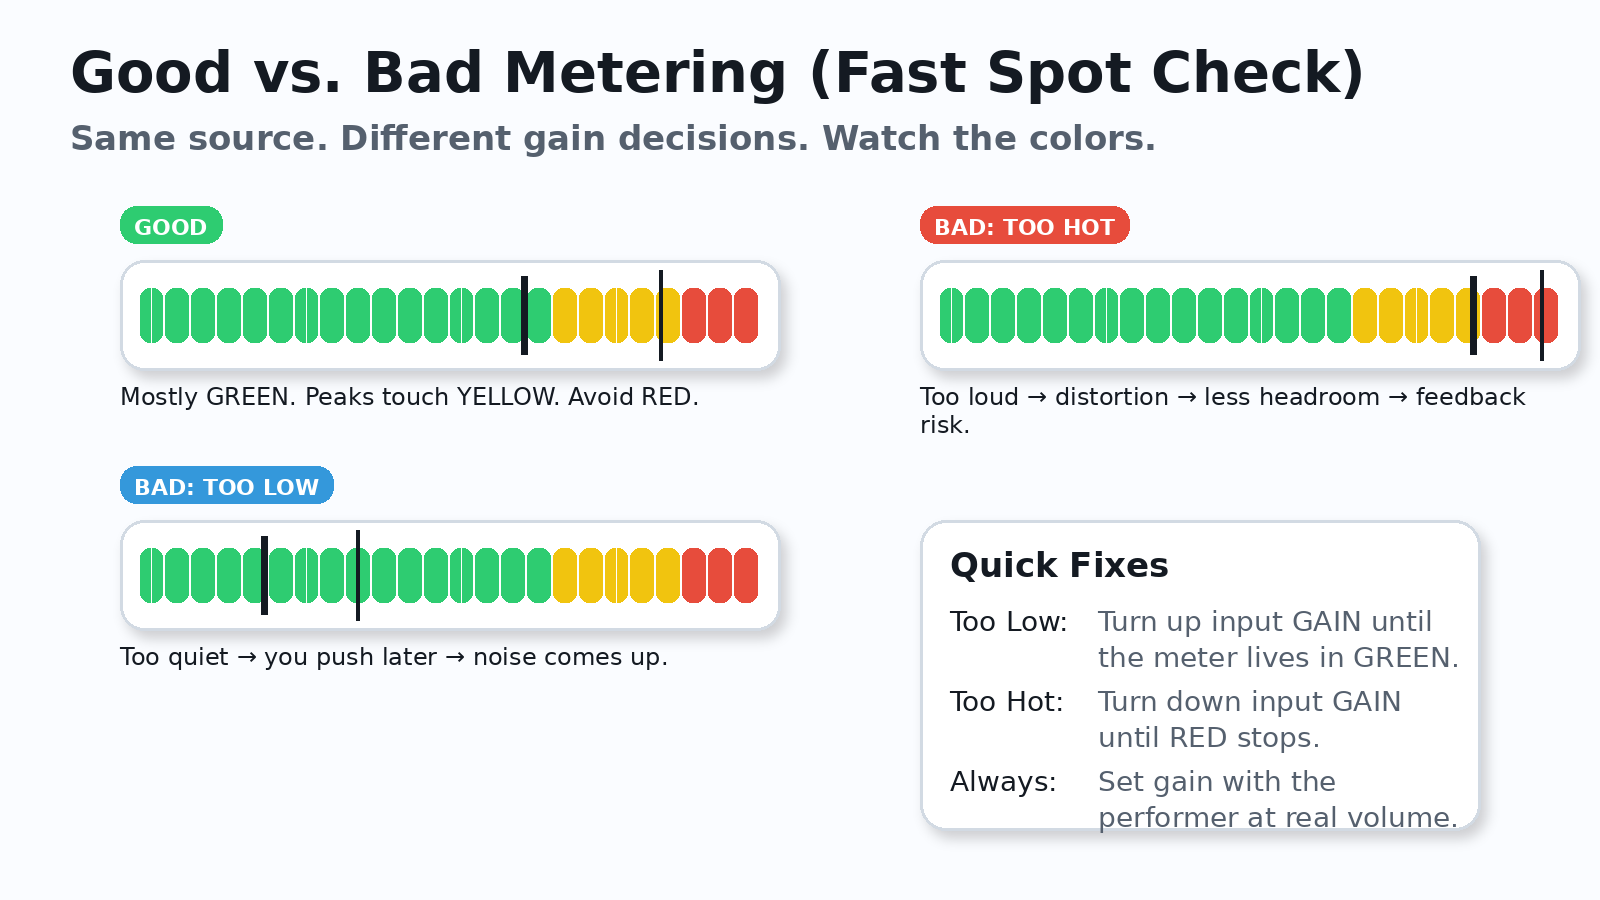
Step-by-Step: How to Set Gain on a Mic (the simple method)
- Set the channel fader around unity (0) as a starting point.
- Have the speaker/singer perform at real service volume (not a whisper).
- Raise GAIN/Trim until the meter stays mostly in GREEN, with peaks touching YELLOW sometimes.
- Engage a high-pass filter (HPF) for speech mics to reduce rumble.
- Now mix with the fader.
Feedback: What It Is (and why gain staging affects it)
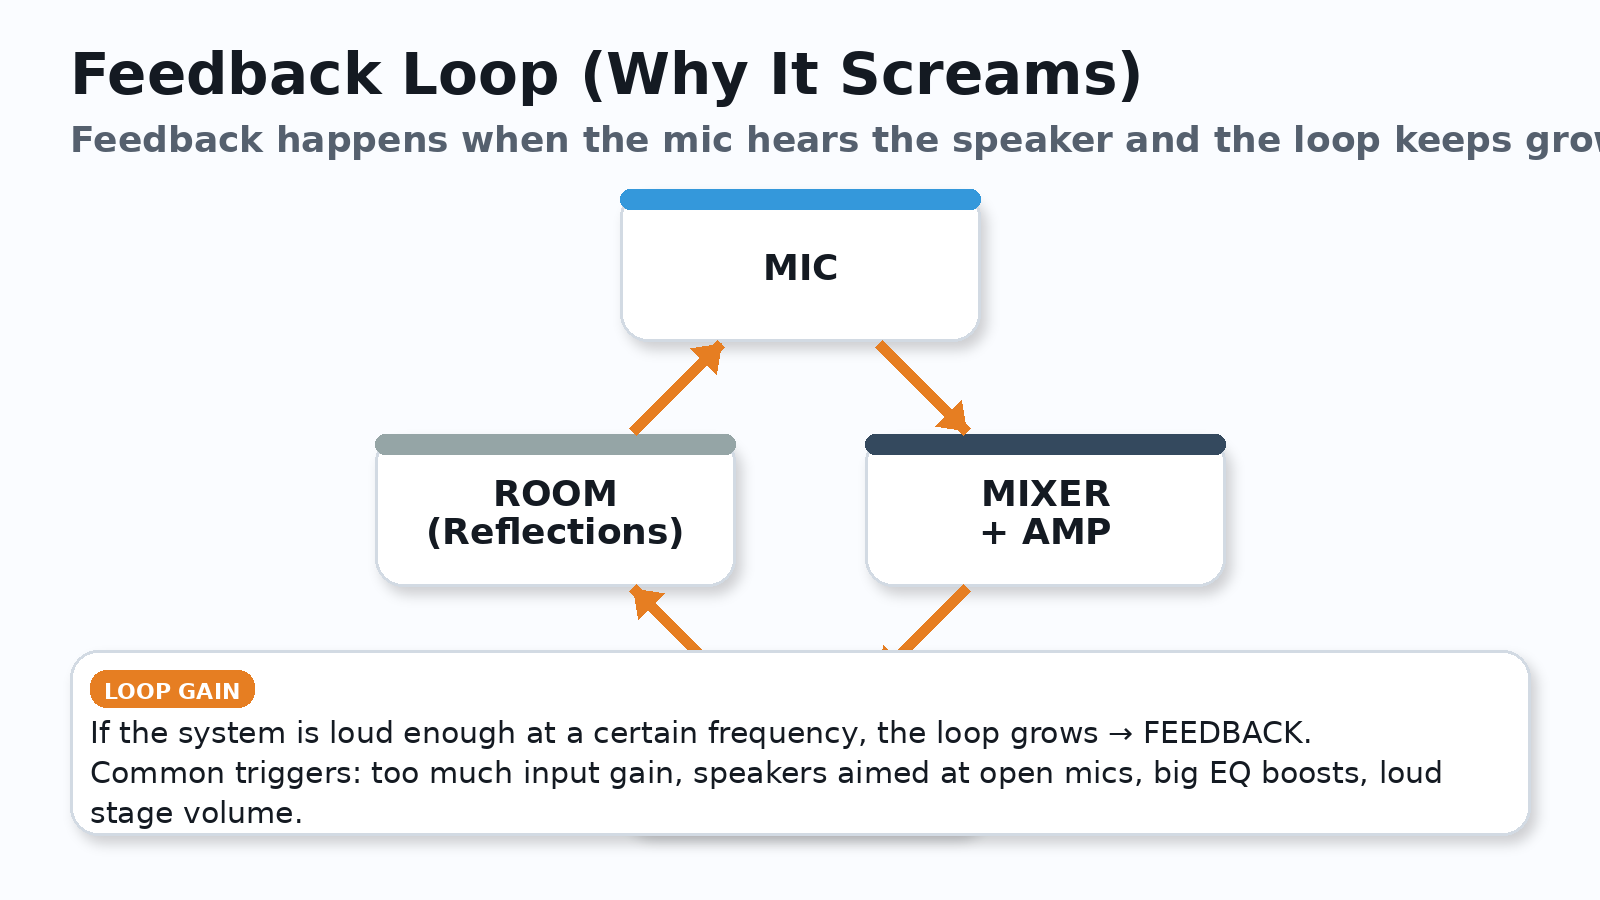
Fast feedback fixes (safe order)
- Lower the offending channel’s level a little (start with the fader, then gain if needed).
- Check mic and speaker placement (don’t aim speakers at open mics).
- Use EQ cuts to reduce the ringing frequency (cuts beat boosts).
- Engage HPF on speech mics.
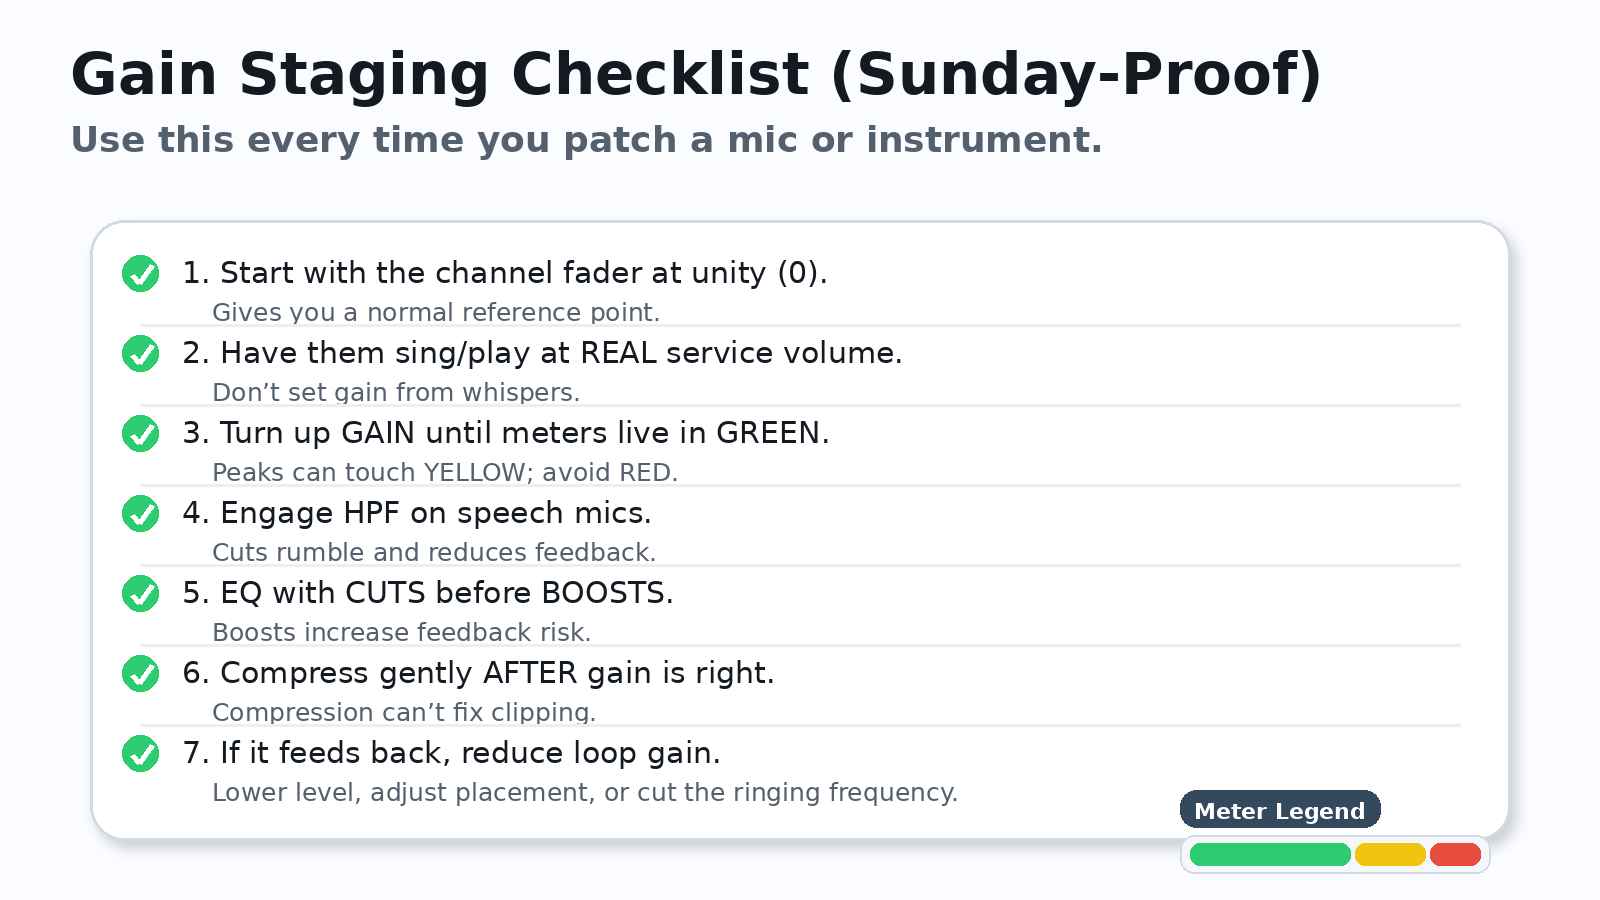
Sunday-Proof Checklist
Quick recap
- Gain staging keeps the signal clean through the whole chain.
- Set input gain with meters before you start mixing.
- Use faders for balance, not for fixing clipping/noise problems.
- Feedback is a loop; reduce loop gain with level, placement, and smart EQ cuts.
No responses yet